
eSIM in Japan: Why the Northern Alps Demand It
Japan, for all its technological prowess, still holds pockets where connectivity is a precious commodity. You step off the Hokuriku Shinkansen at Toyama Station, head into the city's charming Higashi-Iwase district for a final bowl of ramen, and already the signal can feel a bit wobbly compared to the hyper-connected streets of Shibuya. But venture into the Northern Alps, specifically the Hida Mountains stretching across Gifu, Toyama, and Nagano Prefectures, and you're entering a different world entirely. This isn't just about losing a few bars, it's about life-or-death situations where navigation apps, weather updates, and emergency communication become critical.
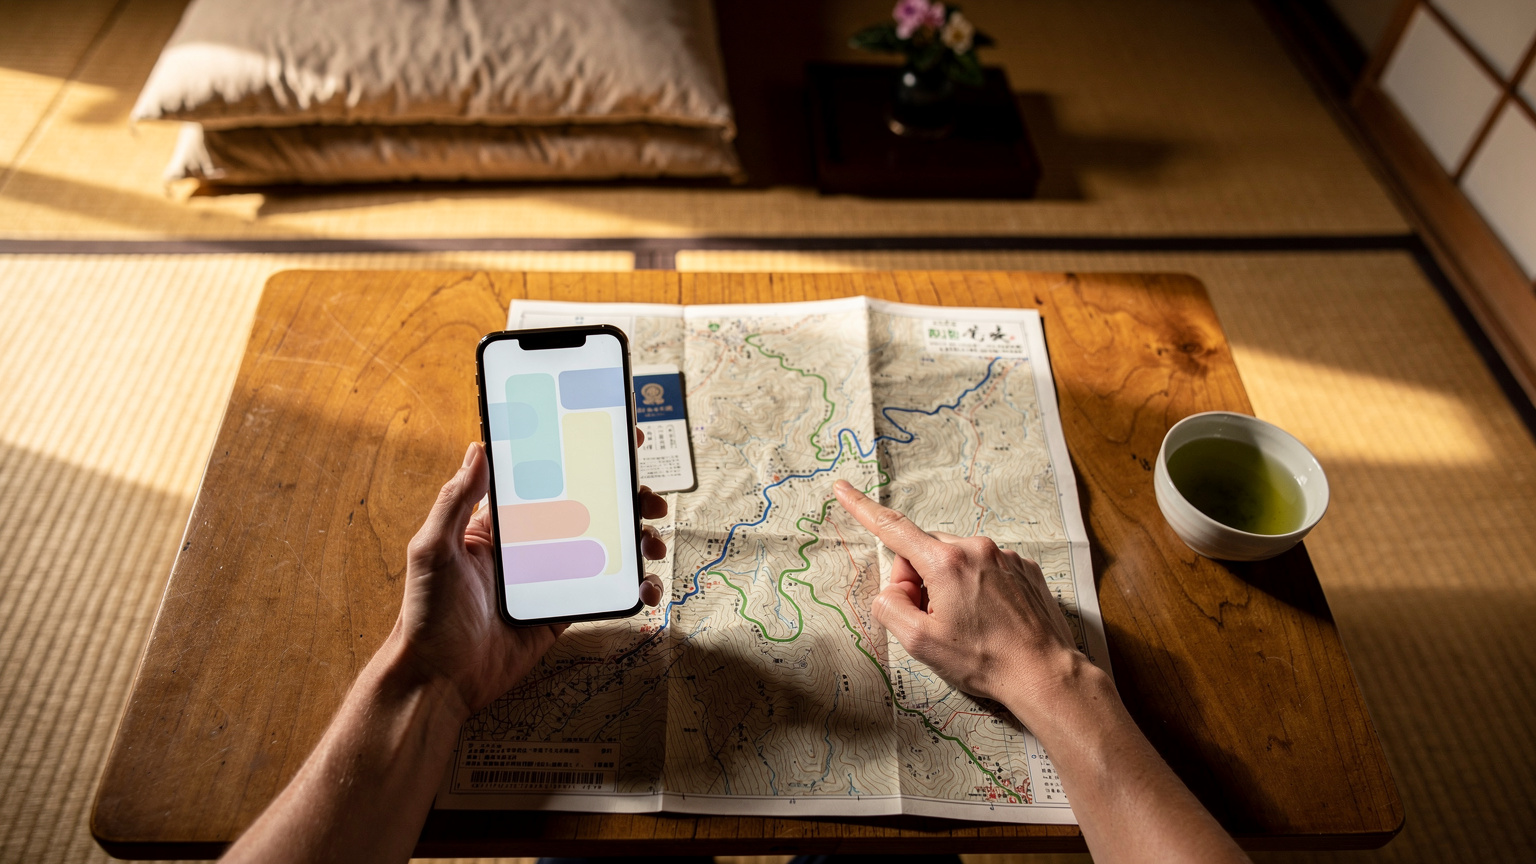
My recent foray into the Yarigatake and Hotakadake massif, often referred to as the 'Matterhorn of Japan', reinforced a long-held belief: preparedness here isn't optional. Having wrestled with unreliable local SIM cards in the past (remember that time in Hokkaido when my data cut out trying to book a taxi from the Niseko Gondola station, leaving me stranded for an hour in the snow?), I knew I needed a more robust solution. This time, I opted for an Areola eSIM. The idea was simple: if it could hold a signal in the deeply carved valleys and high ridges of the Japanese Alps, it could handle just about anything. I specifically targeted routes like the Daikiretto, a notorious knife-edge ridge traverse, where a misstep isn't an option and having a live map is non-negotiable.
The Landscape of Connectivity in Remote Japan
Japan's major cities boast some of the fastest mobile networks in the world, primarily provided by NTT Docomo, au (KDDI), and SoftBank. However, their coverage maps, while impressive for urban areas, often show significant gaps in mountainous regions and national parks. These aren't minor dead zones, but vast expanses where a traditional physical SIM card from a major carrier might leave you completely isolated. For trekkers, this means relying on maps that can download offline, but even then, real-time weather alerts or unexpected route changes require a live connection.
The specific challenge in the Northern Alps isn't just the altitude, but the steep, forested valleys and deep ravines that block line-of-sight to cell towers. Even popular trails, like those leading to Karasawa Col, can have patchy service. This is where an eSIM offering multiple network profiles, or at least a strong partnership with a robust local provider, truly shines. It's about redundancy and reliability, not just raw speed.
Why an eSIM Beats a Physical SIM in the Wilderness
Beyond the flexibility of switching networks, an eSIM offers practical advantages for wilderness travel. Firstly, there's no physical card to lose, damage, or get wet, a blessing when you're fumbling with gear in sub-zero temperatures. Secondly, it streamlines the activation process. Instead of hunting for a SIM card vendor in Tokyo's Shinjuku district, which often closes by 8 PM, or dealing with language barriers at a convenience store like FamilyMart, you can activate your eSIM from home, or even from the comfort of your ryokan in Takayama. For a detailed guide on seamless connectivity in Japan, you might find eSIM for Japan: Your 2026 Guide to Seamless Connectivity in the Land of the Rising Sun quite helpful.
My Areola eSIM Setup: Pre-Expedition Prep
My preparation for this trip started well before I landed at Chubu Centrair International Airport. I'd learned my lesson from previous expeditions, where last-minute scramble for data had led to unnecessary stress. This time, I purchased the Areola eSIM plan a week in advance, opting for a 15GB, 30-day package that I figured would be ample for navigation, occasional photo uploads, and essential communication, even if I spent a week or more in the backcountry.
Activating the eSIM was straightforward, a process that has thankfully become much smoother in recent years. I used my iPhone 14 Pro, which handles eSIMs like a dream (though I've had friends struggle with older Android models, where the settings can be less intuitive). The QR code method is still my preferred way, taking mere minutes. If you're wondering how to get that setup, T-Mobile eSIM QR Code: Smooth Sailing for Your Next Global Trip 2026 offers some good pointers on the general process.
Choosing the Right Data Plan for Alpine Conditions
When selecting an eSIM plan for a demanding environment like the Japanese Alps, it's not just about gigabytes. You need to consider the network partnerships. Areola eSIM, I found, primarily utilizes the NTT Docomo network in Japan, which generally boasts the widest coverage in rural and mountainous areas, a crucial factor. While au (KDDI) also has decent rural reach, Docomo often pips it for sheer geographical spread.
My rule of thumb for remote treks is always to overestimate my data needs. Navigation apps like Yama to Kogen Chizu (Mountain and Plateau Maps), which are indispensable in Japan, can use a surprising amount of data for map tile downloads and GPS-assisted tracking, even with offline maps enabled. Add in quick checks of the Japan Meteorological Agency (JMA) website for updated weather forecasts, and a few gigabytes can disappear faster than you think.
| eSIM Provider | Network Partner (Japan) | Typical Coverage in Alps | Data Plan Range |
|---|---|---|---|
| Areola eSIM | NTT Docomo | Good to Excellent in popular routes | 1GB to 30GB, 7-30 days |
| Local Physical SIM (Docomo) | NTT Docomo | Best available | Varies, often subscription-based |
| Local Physical SIM (SoftBank) | SoftBank | Variable, less robust than Docomo | Varies |
| Other eSIM Providers | Often SoftBank or au | Can be patchy in deep valleys | Similar to Areola |
Activating Your eSIM: A Step-by-Step Guide for Trekkers
Here's how I handled the activation to ensure I was ready to hit the trails, even before I left the city's confines:
- Purchase Your Plan: Go to the provider's website (say, esimAdventures and navigate to the Japan plans at esim-japan) and select the data package that suits your trip duration and expected data usage.
- Receive QR Code/Manual Details: Post-purchase, you'll receive an email with either a QR code or manual activation details. I always prefer the QR code method, it's quick and reduces human error.
- Activate in a Stable Environment: Before you leave civilization, find a place with strong, reliable Wi-Fi, like your hotel in Matsumoto or a café in the Kamikochi area (though WiFi there is often limited to specific lodges).
- Scan QR Code: On your iPhone, go to Settings > Cellular > Add eSIM. Choose the 'Use QR Code' option. For Android, it's typically Settings > Network & internet > SIMs > Add more, then follow the prompts.
- Label Your eSIM: Crucial for multi-SIM users! Label it something distinct, like 'Japan Trek eSIM' so you know exactly which line is active.
- Set as Primary for Data: Ensure your new eSIM is set as your primary line for cellular data. Keep your home SIM active for calls/texts if you expect them, but disable its data roaming to avoid unexpected charges.
Connectivity on the Trail: Areola eSIM in Action
The true test began as I ventured deeper into the Northern Alps. My starting point was Kamikochi, a stunning valley often called the 'Gateway to the Northern Alps'. Even here, at 1,500 meters, signal can be variable, especially around the Kappa Bridge area when many tourists are trying to upload their photos. As I ascended towards the Hotaka mountain range, past the rustic Konashidaira campsite, I kept a close eye on my signal strength, often checking it against my companion's physical Docomo SIM.
What surprised me was the consistency. While not always full bars, the Areola eSIM consistently provided enough bandwidth for critical tasks. In areas like the ridge connecting Maehotaka to Oku Hotaka, where the exposure is extreme and the views breathtaking (and frankly, where you want to be able to call for help if needed), I managed to pull up detailed topographical maps on my Gaia GPS app without issue. This ability to reliably access updated information on an exposed ridge, where a few years ago I would have had nothing, felt genuinely revolutionary.

Signal Strength and Network Performance in the Wild
The Areola eSIM, leveraging NTT Docomo's infrastructure, demonstrated impressive reach. On exposed ridges and near mountain huts like the one at Hotakadake Sanso (which typically operates from late April to early November, weather permitting), I often found 4G LTE service. In deep valleys, for instance, descending from Karasawa Col towards Yokoo, the signal would drop to 3G or even E (EDGE), but crucially, it rarely vanished completely for extended periods. This 'always-on' trickle of data, even if slow, meant I could still send a text message or load a basic weather report, which is paramount.
My experience suggested that the Areola eSIM performs best on Band 1 (2100 MHz) and Band 3 (1800 MHz) in these regions, which are Docomo's primary LTE bands. If your phone supports these, you're generally in a good spot. I recall one particularly tricky descent near the Minamidake mountain hut where heavy fog rolled in, and being able to quickly cross-reference my GPS location with the hut's location on my phone, even with a single bar of 3G, was a genuine relief.
Emergency Communication: When It Matters Most
This is where the reliability of an eSIM truly justifies its place in a trekker's kit. In the event of an emergency, having a working phone is non-negotiable. While satellite communicators like Garmin inReach or Zoleo are the gold standard for truly off-grid situations, a functional cellular connection is often the fastest way to reach local emergency services (dial 110 for police or 119 for fire/ambulance in Japan). The Areola eSIM provided that crucial safety net.
"There was a moment near the base of Mount Okuhotaka when a sudden snow squall rolled in, drastically reducing visibility. My group was a little disoriented. Being able to quickly pull up a detailed map and confirm our exact position, then send a quick update to our contact back in Matsumoto, was incredibly reassuring. It wasn't about streaming video, it was about safety."
I didn't need to make an emergency call, thankfully, but knowing I could, even from a remote mountain slope, provided immense peace of mind. This kind of reliable, always-there connectivity is what separates a good eSIM from a great one for adventure travel.
Battery Life and Device Management in the Cold
Cold weather is the enemy of smartphone batteries. Anyone who's tried to snap a photo on a snowy peak only to have their phone die instantly knows this pain. My iPhone 14 Pro, while robust, is no exception. Running navigation apps and constantly searching for signal drains power quickly. This is where careful device management becomes paramount, regardless of your chosen connectivity solution.
I carried two fully charged power banks, a 20,000 mAh Anker and a smaller 10,000 mAh Nitecore, kept close to my body to maintain their charge. My phone itself stayed in a waterproof, insulated pouch in my inner jacket pocket, only pulled out when absolutely necessary. Even with these precautions, a full day of heavy navigation use could deplete my phone by 50-60%. It makes you appreciate the old days of paper maps and compasses, doesn't it? (Though I certainly don't miss them for accuracy.)
Optimizing Your Phone's Settings for Wilderness Use
To maximize battery life and ensure the Areola eSIM performed optimally, I employed several strategies:
- Disable Background App Refresh: This prevents apps from consuming data and battery in the background.
- Turn Off Push Email/Notifications: Set email to fetch manually, and silence non-essential notifications.
- Lower Screen Brightness: Obvious, but often overlooked. Use the lowest comfortable setting.
- Enable Low Power Mode: Apple's Low Power Mode (and similar features on Android) can significantly extend battery life.
- Download Offline Maps: Before leaving Wi-Fi, ensure all your navigation maps (Yama to Kogen, Maps.me, Gaia GPS) are fully downloaded for offline use. This reduces the need for constant data fetching.
Remember, even with an eSIM, data is a finite resource. Smart usage prolongs both your battery and your data allowance.
Power Banks and Solar Chargers: Your Off-Grid Companions
For multi-day treks, a reliable power bank is non-negotiable. I typically carry enough capacity to fully charge my phone at least three times. For longer expeditions, or if I anticipate many days without access to an outlet (rare in Japan's well-maintained mountain huts, but possible if you're camping), a compact solar charger can be a lifesaver. Brands like Goal Zero and BioLite offer lightweight, durable options that can trickle-charge devices during sunny lunch breaks. Just be aware that solar charging efficiency drops dramatically in overcast conditions or deep shade, common in mountain environments. It's a supplemental power source, not a primary one.
Troubleshooting and Support: When Signals Fade
Even the most reliable eSIM can hit a snag. Whether it's a momentary network glitch or user error, knowing how to troubleshoot quickly is essential. During my descent into the quaint riverside town of Kamitakara Onsen, nestled in the Okuhida region, my signal briefly dropped out entirely. It was a momentary panic, as I was trying to confirm bus times for the Nohi Bus line back to Takayama Station (the last bus from Hirayu Onsen to Takayama is usually around 5:30 PM, so timing is tight!).
My first thought was always to check my phone's settings, then restart the device. Simple, but effective. If that fails, knowing how to reach support, even with limited connectivity, is crucial. This is where having a secondary communication plan, like a pre-arranged check-in time with a friend via satellite messenger, can be invaluable.

Common eSIM Issues and Quick Fixes
If your Areola eSIM isn't connecting, try these steps:
- Toggle Airplane Mode: Turn Airplane Mode on for 30 seconds, then off. This often forces your phone to re-scan for available networks.
- Check Data Roaming: Ensure data roaming is enabled for your eSIM line in your phone's settings. Sometimes it gets disabled by default.
- Restart Your Phone: The classic IT solution, but it works surprisingly often to clear minor software glitches.
- Manually Select Network: In your phone's cellular settings, you can often manually select a network operator (e.g., NTT Docomo). This can sometimes force a connection when automatic selection fails.
- Verify APN Settings: While usually automatic, incorrect Access Point Name (APN) settings can prevent data connectivity. Check your eSIM provider's documentation for the correct APN and compare it to your phone's settings.
- Contact Support: If all else fails, reach out to your eSIM provider's support. Have your account details ready. Many providers offer chat support through their website, which can be accessed via Wi-Fi if available. For general eSIM troubleshooting tips, you might want to look at Finding Your eSIM Number on iPhone & Android: The Backpacker's 2026 Guide.
Getting Support in Remote Areas: What Areola eSIM Offers
Areola eSIM, like many providers, offers 24/7 online chat support. While this isn't much help if you're truly off-grid with no signal, it's excellent for resolving issues when you have intermittent connectivity or are at a mountain hut with Wi-Fi. I once had a minor issue with my data balance not updating (my fault, not the eSIM's), and their chat support resolved it within 10 minutes when I was staying at the Sanso mountain lodge in Kamikochi.
It's always a good practice to download their app or save their support contact details offline before you embark. Having an email address or a phone number to call (if you have Wi-Fi calling enabled) can be a fallback. For me, the peace of mind comes from knowing that even if I hit a wall, there's a clear path to resolution once I reach a spot with minimal connectivity.
Areola eSIM Versus Local SIM Cards: A Trekker's Choice
The choice between an eSIM like Areola and a traditional local physical SIM card in Japan ultimately boils down to convenience, flexibility, and your specific travel style. For a long-term resident or someone staying exclusively in highly connected urban areas, a physical SIM from a major carrier might offer slightly better value in terms of raw data per yen. However, for the adventurer, the short-term traveler, or anyone who values seamless activation and multi-network flexibility, an eSIM often comes out on top.
My past experiences with local SIMs involved navigating complex Japanese contracts, often needing a local address or a more complicated registration process. Prepaid physical SIMs are available, but they often have data caps that don't reset easily or require top-ups at specific stores, which can be a hassle when you're far from a 7-Eleven or Lawson. The beauty of an Areola eSIM is its digital nature: buy, activate, connect. It's the kind of streamlined process that makes a real difference when you're planning a multi-faceted trip to Japan.
Cost Comparison and Value for Money
Let's break down the typical costs. A physical prepaid SIM from a Japanese carrier for, say, 10GB over 30 days might cost around ¥4,000-¥6,000 (roughly $25-40 USD, depending on the exchange rate). An Areola eSIM with a similar data allowance and validity period typically falls into the same range, sometimes slightly higher for the convenience. However, the value isn't just in the gigabytes. It's in the ease of purchase before you even land, the immediate activation, and the ability to switch plans or top up digitally from anywhere with an internet connection.
| Feature | Areola eSIM | Local Physical SIM |
|---|---|---|
| Purchase Method | Online, pre-trip | In-country at airport, store |
| Activation Time | Minutes, remote | Minutes to hours, in-person |
| Network Flexibility | Often partners with leading local network (e.g., Docomo) | Locked to one specific carrier |
| Physical Handling | None, digital profile | Requires physical insertion, easy to lose |
| Multi-Country Use | Seamlessly switch to other region plans | Requires new SIM for each country |
The Convenience Factor for Multi-Destination Travelers
For someone like me, who often hops between countries on a single trip (I'm eyeing a climb in Nepal next spring), the multi-country flexibility of an eSIM is a massive advantage. Instead of collecting a drawer full of defunct physical SIM cards, I can simply install a new eSIM profile for my next destination. This is especially useful for last-minute summer getaways, or when you're traversing multiple regions without wanting to deal with the hassle of physical SIMs. It removes a layer of logistical headache that, after 15 years on the road, I'm more than happy to shed.
Planning Your Japanese Alpine Adventure with eSIM
Embarking on an adventure in Japan's Northern Alps requires meticulous planning, from route selection and gear preparation to understanding local customs and, crucially, ensuring you're connected. The Areola eSIM, in my experience, significantly simplifies the latter, allowing you to focus on the breathtaking scenery and the challenge of the climb, rather than worrying about your phone signal.
When planning, always check the operational dates for mountain huts. Many in the Northern Alps, like the famous Yarigatake Sanso, are only open from late April/early May until late October/early November, and closures are dictated by snow conditions. Trying to confirm an opening time for a hut via a patchy signal can be a nightmare. Having a reliable connection to check their official websites or call ahead is a game-changer. I always make sure to download any relevant bus schedules, like those for the Nohi Bus or Alpico Transportation, offline, but having the eSIM for real-time updates is always a relief, especially when dealing with the intricacies of Japanese public transit.
Essential Apps for Japan's Wilderness Treks
- Yama to Kogen Chizu (Mountain and Plateau Maps): The definitive Japanese hiking map app. Requires annual subscription but offers incredibly detailed topographical maps, downloadable for offline use.
- Gaia GPS / AllTrails: Excellent alternatives for global trail data and route planning. Ensure you download maps for your specific area.
- Japan Official Travel App: Useful for general travel information, emergency contacts, and some Wi-Fi hotspot maps.
- Google Translate: While most mountain hut staff have some English, a translation app can be invaluable for specific questions about routes or conditions.
- Japan Meteorological Agency (JMA) App/Website: For accurate and up-to-date weather forecasts, especially critical in the mountains.
Safety Considerations and Connectivity Best Practices
Your eSIM is a powerful tool, but it's part of a larger safety strategy. Never rely solely on your phone for navigation or communication. Always carry a physical map and compass, and know how to use them. Inform someone of your itinerary, and consider carrying a personal locator beacon (PLB) or satellite messenger for truly remote, off-grid expeditions. The Areola eSIM provides an excellent layer of connectivity, enhancing your safety, but it's not a substitute for fundamental wilderness skills and redundancy.
It's about having options, ensuring that if one system fails, you have another to fall back on. The Areola eSIM adds a robust, modern option to that vital safety chain.
Final Thoughts on Areola eSIM for Remote Japan
Having navigated the challenging terrain of Japan's Northern Alps with an Areola eSIM, I can confidently say it's an invaluable tool for any serious trekker or outdoor enthusiast. Its consistent performance, leveraging the robust NTT Docomo network, provided crucial connectivity for navigation, weather updates, and emergency communication in areas where traditional signals are notoriously unreliable. The ease of activation and management, coupled with its digital nature, makes it a superior choice over physical SIM cards for short-term and adventure travel in Japan.
From the bustling streets of Kanazawa's Omicho Market, where I picked up some last-minute snacks, to the windswept ridges above Kamikochi, the Areola eSIM kept me connected. It allowed me to share moments, access vital information, and most importantly, enhanced my safety in truly remote environments. If your Japanese adventure involves more than just city sightseeing, if it takes you off the beaten path into its stunning wilderness, then an Areola eSIM should be at the top of your connectivity checklist.
Who Should Consider an Areola eSIM for Japan?
- Adventurers and Trekkers: Those heading into Japan's national parks, mountains, or rural areas where signal can be spotty.
- Short-Term Visitors: Travelers on trips lasting a few days to a month, who want quick, hassle-free data without long-term commitments.
- Multi-Destination Travelers: Individuals visiting Japan as part of a larger Asian itinerary, benefiting from easy eSIM switching.
- Tech-Savvy Travelers: Anyone with an eSIM-compatible phone who prefers a digital, streamlined approach to connectivity.
The Future of Connectivity in Japan's Wilderness
As eSIM technology continues to evolve, and network coverage gradually expands even into more remote corners of Japan, the experience for adventurers will only improve. The days of being truly 'off-grid' without any means of digital communication are slowly fading, replaced by reliable, accessible solutions like the Areola eSIM. This isn't just about convenience, it's about making the wilderness safer and more accessible for everyone who seeks its profound beauty. My journey through the Northern Alps proved that the Areola eSIM is already a significant step in that direction, bridging the gap between raw nature and essential modern connectivity.
Frequently Asked Questions
Does the Areola eSIM work in remote mountainous regions of Japan?
Yes, based on my expedition in the Northern Alps, the Areola eSIM, which primarily leverages NTT Docomo's network in Japan, provided consistent connectivity even in challenging terrain. While signal varied, it rarely vanished completely, allowing for navigation and basic communication.
Is it easy to activate an Areola eSIM for Japan?
Activating the Areola eSIM is a straightforward process, typically involving scanning a QR code from a stable Wi-Fi connection before your trip. This eliminates the need to find a physical SIM card in Japan and can be done in minutes.
What data plan is recommended for trekking in the Japanese Alps?
For serious trekking in the Japanese Alps, I recommend overestimating your data needs. A 15GB, 30-day plan is a good starting point for navigation, weather updates, and emergency communication. Always download offline maps to conserve data.
How does Areola eSIM compare to a local Japanese physical SIM for travelers?
Areola eSIM offers superior convenience and flexibility for short-term and adventure travelers, with online purchase, remote activation, and no physical card. Local physical SIMs might offer slightly better value for long-term residents but involve more complex in-country activation and are locked to one carrier.
What should I do if my Areola eSIM loses signal in the mountains?
If your Areola eSIM loses signal, first try toggling Airplane Mode, restarting your phone, or manually selecting the NTT Docomo network in your phone's settings. Ensure data roaming is enabled. If issues persist, contact their 24/7 online support when you have Wi-Fi access.
Can I use my Areola eSIM for emergency calls in Japan's wilderness?
Yes, if you have a signal, your Areola eSIM can be used for emergency calls (dial 110 for police, 119 for fire/ambulance). It provides a crucial safety layer, though a satellite communicator is recommended for truly off-grid situations.